Archive | Makeup Looks RSS feed for this section

Laura Mercier Face Illuminator Review

26 Sep

Hi everyone! I’m so sorry I haven’t been blogging for all of you, I’ve just been trying to adjust to college as well as the other changes that come along with beginning a new chapter of your education and life, but I’m back today with yet another product review and this time it is for the Laura Mercier Face Illuminators. I’m sure all of you already know about this particular brand since it has been around forever. Laura Mercier is definitely a brand that I would recommend mainly because their products have very high quality and are very easy to depend on in order to make yourself look flawless when doing your makeup.

So I was at Lord and Taylor recently and I came across the Laura Mercier counter and I happened to come across the highlighters in which were on display. Immediately I fell in love with them, they just looked so amazing and each shade looked so stunning. I fell in love with the shade Devotion right away.

They had four shades on display which happened to be, Indiscretion, which is a beautiful warm rose gold shade, Seduction, gorgeous soft bronze, Addiction, a lovely gilded gold shade, and of course Devotion, lovely cool pink color.

So I ended up purchasing the shade Devotion because I loved it so much and I felt that it would go along perfectly with my complexion. These highlighters cost forty four dollars each, and have multi-use purposes. They can be applied anywhere you wish, eyes, face, or even the neck area. This particular product is also build-able, so you can choose to keep it subtle or you can choose to build it up in order to reveal its intensity. The great thing about these highlighters is that there’s a shade for every skin tine, which is mainly why I chose Devotion since I felt it went the best with my particular skin tone. I love that anyone can choose which one they think suits them best, especially since purchasing highlighters can be tricky for most girls/women, mainly because of their skin tones.

These highlighters are also oil-free and are recommended to be applied with a brush for the best results possible.


So this is what the highlighter looks like, as you can tell I’ve used it a lot since I’ve purchased it, and that’s mainly because I love it so much! As you can also tell from the swatches in the pictures above, I applied it very sheerly on my wrist, I needed keep applying more product over and over again, but trust me when I say that these illuminators are very pigmented and very build-able, I really like them and would definitely recommend them.

I also really like the design of the illuminator itself, I like how it looks in its pan, I also think that it really draws you in when you see it, which was what it did to me when I saw it on the display!

So I really hope you guys check out this particular product I would recommend it to anyone, especially since I’ve been loving it! I know it may seem a bit overpriced to some, but if you are a makeup lover, or a lover of highlighters, then you must try this product for yourself.

Thank you all so much for checking out my blog, and I will have another post up for you all soon!

Muah!

xoxo


NuMe Review

30 Mar

Hi guys! So today’s post is going to be all about NuMe. For those of you who may not already know, NuMe happens to be a very well known hair brand, they are very well known for their hair irons such as their flat irons and curling wands. I started getting into this brand a couple of months ago, although I always heard/knew about them. TjMaxx now carries some of their irons, which I thought was amazing since the only place you can purchase anything from NuMe was directly off of their website. So now that TjMaxx carries them], it is easier for me to see the iron itself in person, so that I am able to see how I feel about and whether or not I would want to purchase it.

The first time I ever purchased anything from NuMe directly, was this past summer. I actually follow NuMe on Instagram and I had noticed one morning that they posted a picture of a sale they were dong for two days on their website, where you can get any curling wand for only twenty seven dollars as opposed to purchasing any of their curling wands for their regular prices of eighty to ninety dollars each. I immediately went onto their website and picked a curling wand that I have been wanting to try out. I was so happy that I got this curling wand for twenty seven dollars, I thought it was such a great deal especially since everyone rants and raves about this brand and their products.

So the curling wand I got is the Classic 32MM Wand, in the color pink, they also offer this wand in black and teal. For those of you who may not know about hair irons, the bigger the barrel is on a curling iron or curling wand is, the bigger/looser your curls will be. The smaller the barrel is, the tighter and more curlier your curl will be. I personally like bigger, looser curls so I decided to purchase the 32MM. NuMe offers 19MM wands, 25MM wands, and 32MM wands. The 32MM obviously gives the bigger curls, 19MM give the smaller, tighter curls, and the 25MM is like a happy medium, so you curls will still be tight but also a little bit more bigger and voluminous when you use that barrel size.

image.jpeg

image

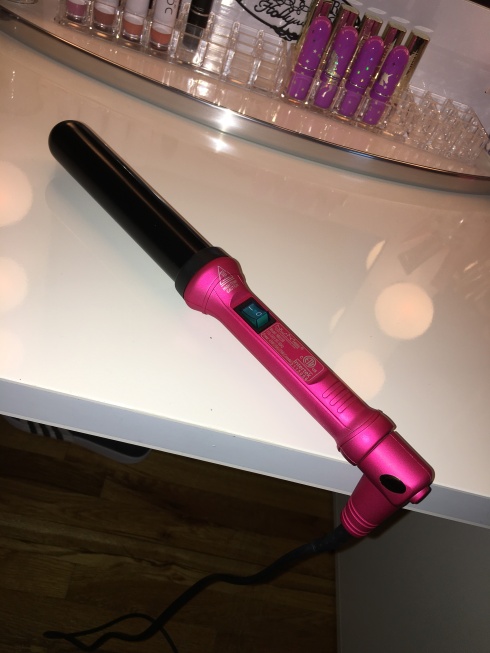
So the first picture shows what the wand looks like, as you could see the barrel is pretty big. I happen to love this wand, the only thing I don’t like about this particular wand is that it doesn’t show the degrees in which the wand can exceed. The only warning I have to anyone is that this wand gets extremely hot, so be extremely cautious when using it. But that pretty much goes for any hair iron, whether that be a curling wand, regular curling iron, or a straightener, always be cautious and careful when using these tools. I can’t even count how many times I’ve burned myself when using this particular wand but I guess you can say pain is beauty! NuMe does give you a glove with this particular iron so that you can wear it to protect your hand when using it, but of course I never do. I would definitely suggest wearing it just to protect yourself.

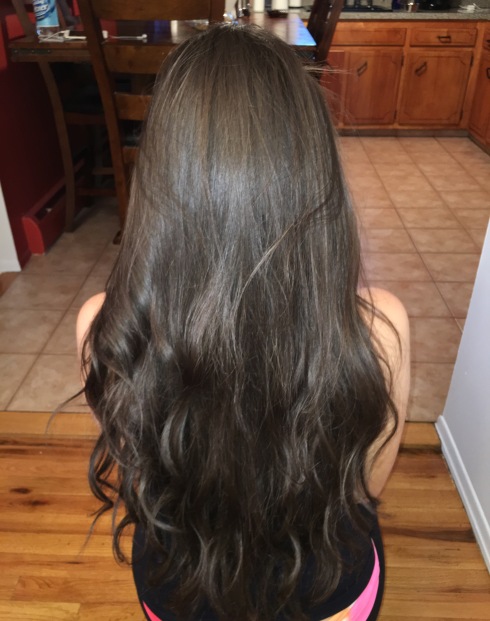
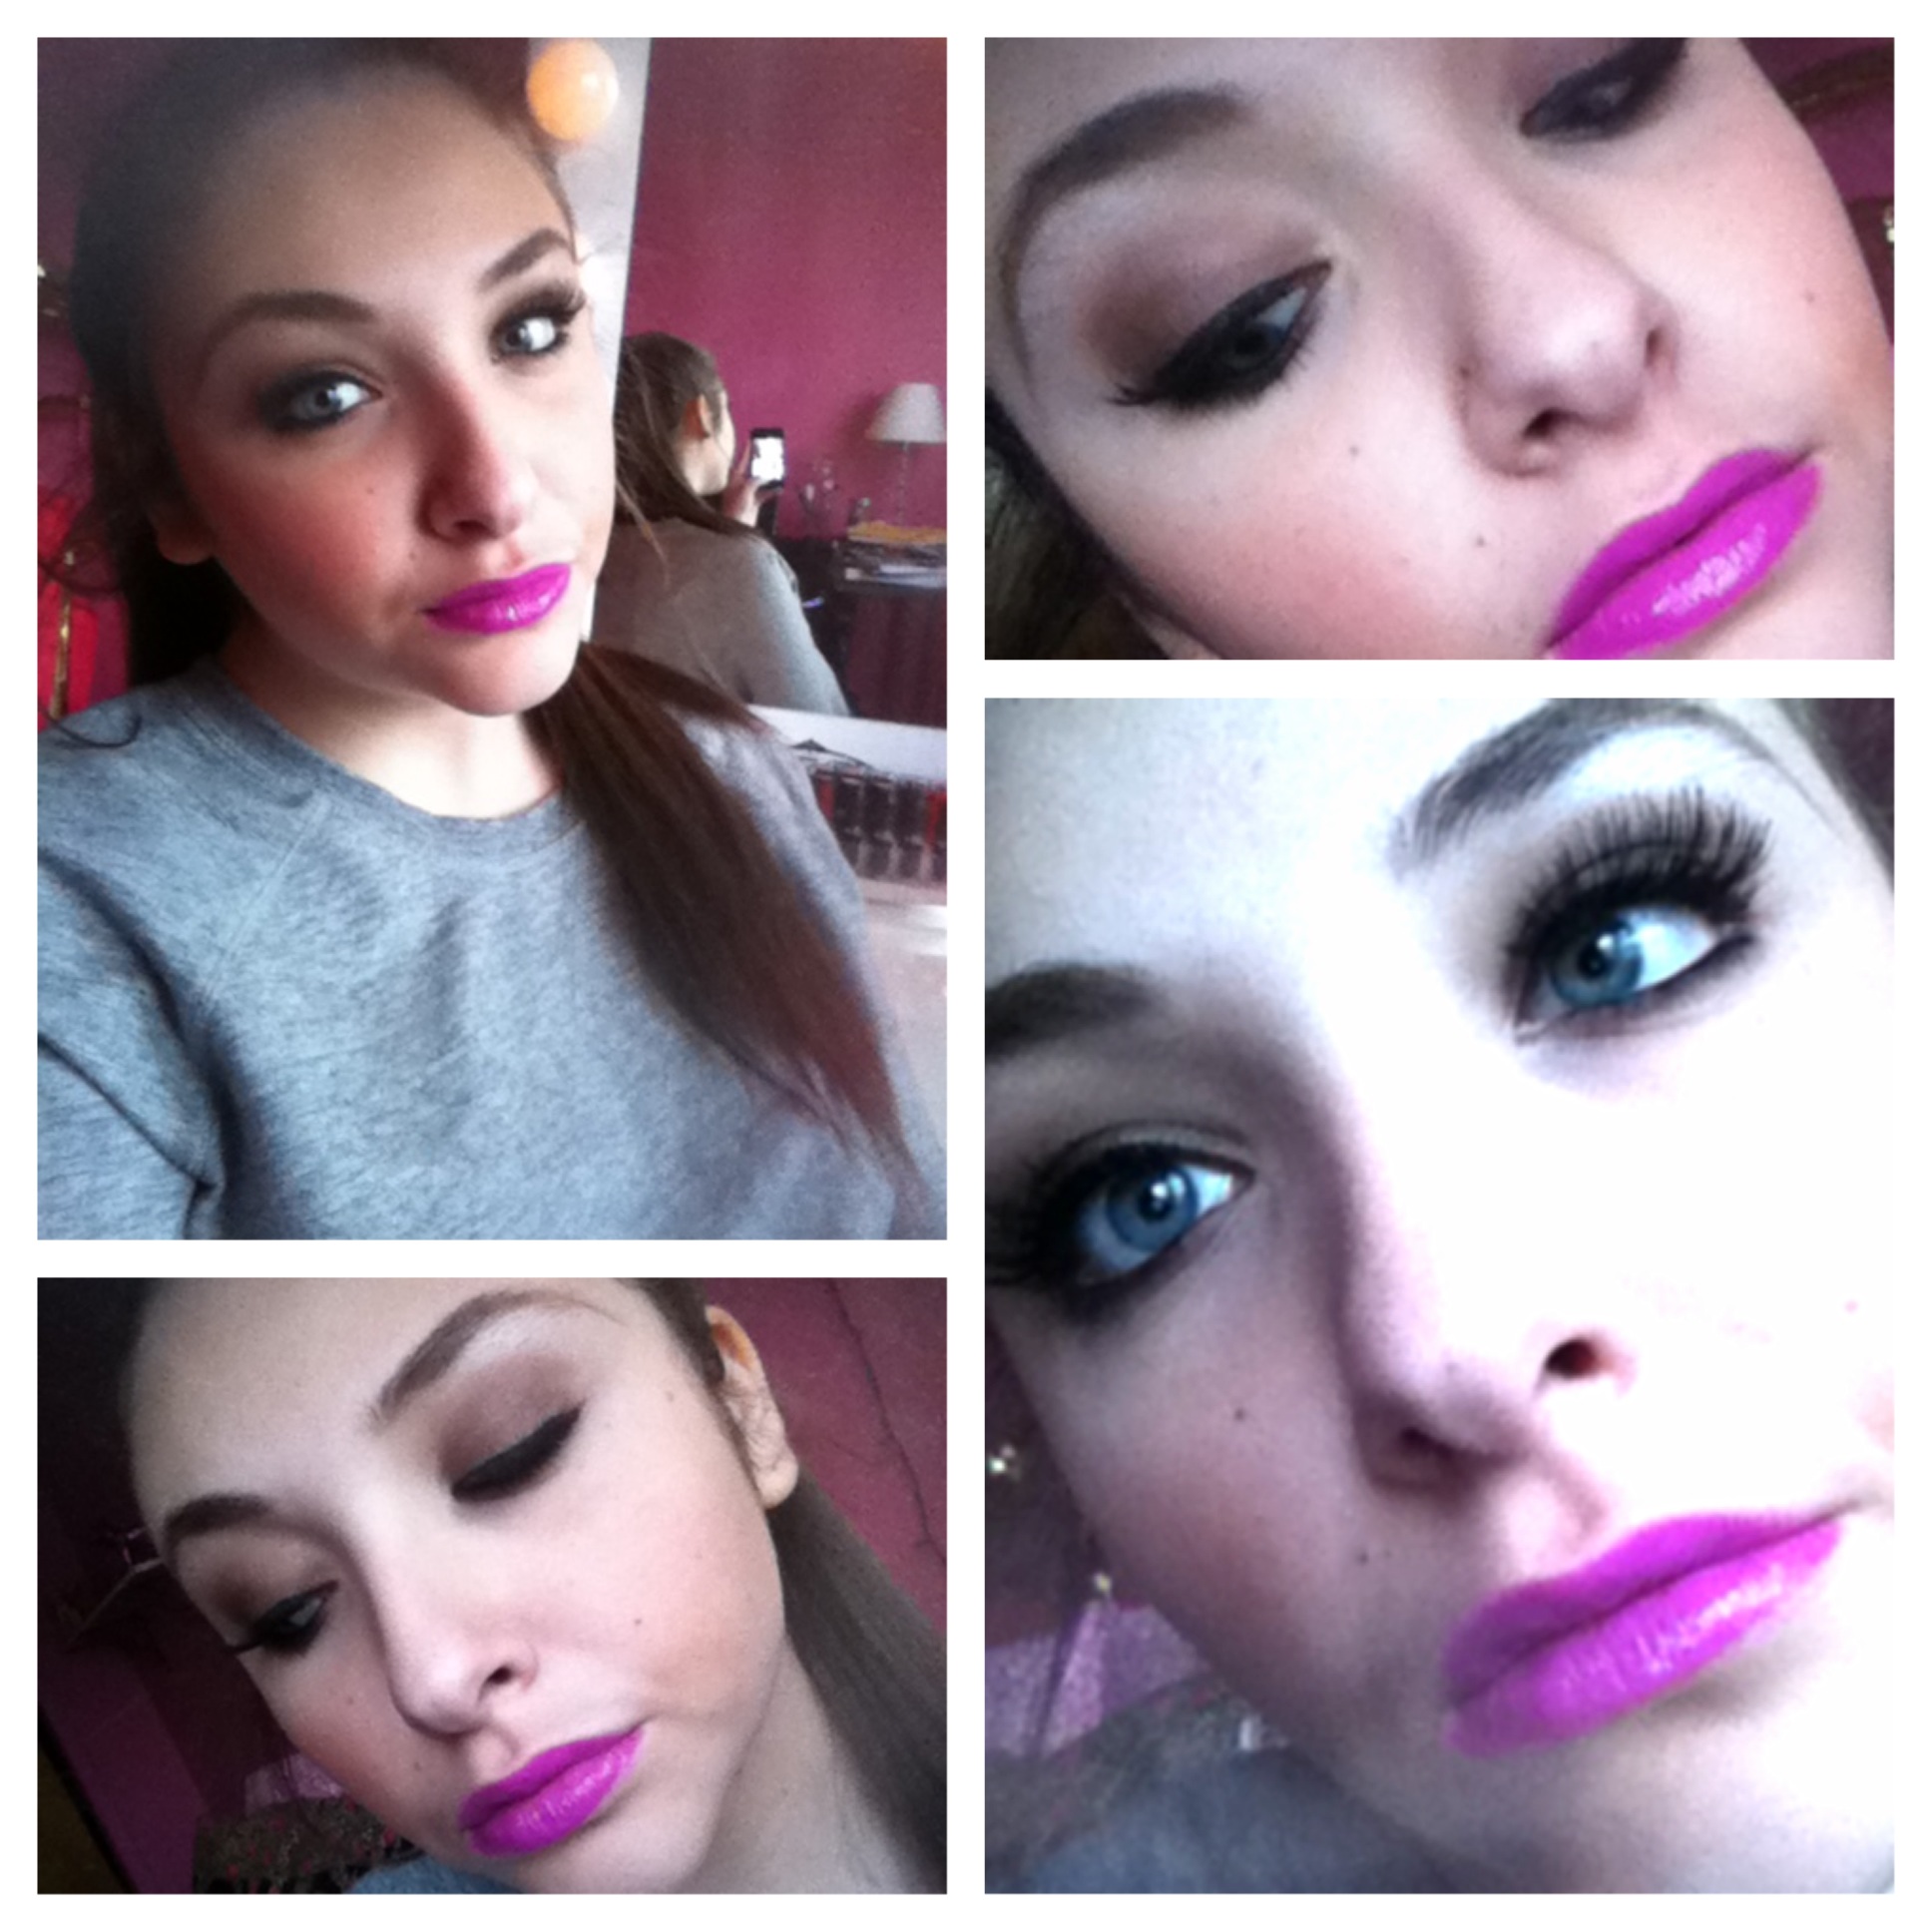
I also figured I would show you guys how my hair looks after I use this wand as well. I love the beachy waves look, it looks effortless, when really you actually did put in effort to achieve it. You can get tighter curls by using this wand if you choose to pin your curls up but I decided not to because I wanted looser waves rather than tight curls. I used the NuMe Silhouette Straightener, (I will talk about this product in a minute!) to straighten the top portion of my hair and then I used the 32MM wand to curl midway to the end.

NuMe does offer many different wands, so you definitely have a variety of wands to choose from if you decide that you want to purchase one of their wands. I absolutely love the 32MM that I purchased from them, I love how big and voluminous my curls are when are use this wand on my hair. I would definitely recommend this wand, or for that matter any of their wands, I have just fell in love with this want, and whenever I want to curl my hair, that is my go to iron to get the job done.

A couple of months ago, I went to TjMaxx and I was looking around in the beauty section of the store and I saw a bunch of NuMe boxes. They happened to be a bunch of their Silhouette Straighteners. They were selling it for thirty dollars which I thought was incredible because this particular hair straightener from NuMe is about one hundred dollars. I didn’t even hesitate to buy it, I knew that this was a good deal and I had to have it. The one I purchased is pink and I thought it was great since the curling wand I purchased from NuMe is pink, so I was happy about having them match as well. The Silhouette is available in pink, obviously, and it is also available in teal, black, and purple. NuMe does offer other straighteners besides the Silhouette, prices for these irons can range anywhere from one hundred dollars to one hundred thirty depending on the iron itself.

image.jpeg

image.jpeg

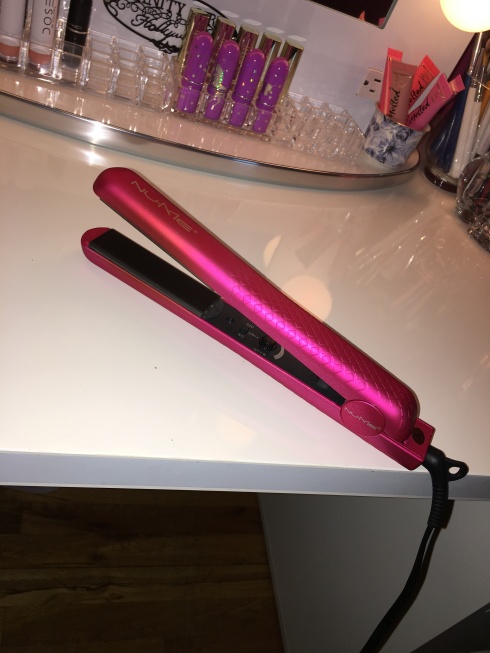
This is what the Silhouette Straightener looks like. I love this straightener, it is definitely a sturdy and reliable iron to use and have. I would definitely recommend it to anyone because it really does get the job done. I use it very often and I just love it, it really gives your hair that pin straight look, which is great.

image.jpeg

I really encourage all of you to check out NuMe and their products. Their hair tools are definitely an investment for any girl. They are a total must have and an absolute favorite of mine, I hope that they will be a favorite of yours as well!

Thank you all so much for checking out my blog and I will have another post up for you guys tomorrow!

Muah!

xoxo

House of Lashes Review

29 Mar

Hey everyone! So today’s post is going to be all about House of Lashes. I believe I did a post a long time ago on my blog, regarding House of Lashes and what they have to offer as a brand but for those of you who may not already know, House of Lashes happens to be a very well known eyelash brand. They mainly specialize in high quality eyelashes, which can endure a good ten to fifteen time usage. They are mostly known for their Iconic Lashes, which are one of my favorites, I must say!

House of Lashes is an eyelash brand that I have known about for a while but I am a relatively new consumer/customer of theirs. I have only been purchasing and using some of their eyelashes for about a month now and I have grown to love them. The quality of their lashes is beyond incredible. I promise you that these lashes are worth every penny. So if you are looking for a standard, highly liked eyelash brand that you can depend on for not only quality, but for the look as well, House of Lashes should be your go to brand.

When I first purchased lashes from HOL, I only purchased two pairs, and those were the Iconic and Siren lashes. I decided to try out two of their popular pairs first to see what all the fuss was about. I wanted to try these first since I’ve heard nothing but great things about them and because I wanted to test out their quality and durability for myself as well.

The Iconic Pair is one of HOL’s masterpieces. This particular pair of lashes is one of their most popular and raved about styles, since it gives this amazingly glamorous effect to any makeup look. The Iconic Lash is a part of HOL’s Premium Luxe Collection of lashes, meaning that every lash that is included in that collection is a lot more bolder and dramatic, as opposed to some of their other lashes. An individual pack of Iconic Lashes does cost about twelve dollars, or you could choose to purchase a three pack of Iconics for thirty dollars. HOL does that with all of their lashes as well, you could choose to purchase an individual pair or a three pack of any one of their lashes, so it is completely up to you to decide what is worth purchasing.

image

image

So this is what the Iconic pair looks like, as you can see they are very bold and dramatic. I absolutely love them! I have become so obsessed with them, every time I do my makeup I want to put these on! They look so beautiful when they are on and they give such a glamorous vibe to your makeup look as well.

Be aware that some of their lashes, based on their popularity and boldness, will have different prices. Whether it be individually or a pack f three, they can vary in prices.

The collections that they do offer are Au Naturale, which are more natural looking lashes, Flirty, which can also be considered to be on the natural side but they do give off a more dramatic effect, Glam, which obviously are more bold and glamorous, Premium Luxe, which can be considered to be very dramatic and luxurious, Le Petit, which are individual lashes, as well as bottom lashes. So as you can imagine, HOL does offer a wide range of lashes that you can choose from.

The Siren lash is a part of HOL’s Flirty collection. An individual pack is about nine dollars and a three pack is about twenty two dollars. I have fell in love with both the Siren and Iconic Lashes. They give such a beautiful look to your eyes when you wear them.

image

image

So this is what the Siren lash looks like, as you can probably tell I have been using them a lot but that is only because they are a beautiful lash. This particular if I would definitely recommend to anyone, they are so easy to apply and they look beautiful on as well!

HOL is killing the lash game, they have so many different styles to choose from, so you are guaranteed to make any makeup look, look absolutely beautiful when using their lashes. I would definitely recommend them to anyone, I think they are worth every penny.

I also recently ordered and received, their Premium Lash Custom 3-Pack, I believe they were also offering this for another lash collection of theirs, but as of right now it’s only for their Premium Luxe lashes. So basically you can choose three different premium luxe lash styles for thirty dollars as opposed to buying a three pack of one specific lash style for thirty dollars. I did this deal, I thought it was a great idea of HOL because it gives their customers the opportunity to try out more lashes. I selected Iconic, because I love them so much, Featherette, and Pixie Luxe. I did receive my lashes from this deal and I have to say I love them all! HOL still has this deal going on, on their website so I would definitely recommend going on their website and checking this deal out for yourself.

image

image

So these are the three pairs that I picked for the custom deal. Starting with the top left we have Pixie Luxe, next to that is another pair of Iconics , and then on the bottom we have Featherette. I absolutely love these lashes, I would definitely purchase all of them again, and I’m sure you all can tell that I’ve been wearing all of them already!

image

image.jpeg

These are all of the lashes that I ordered, together. I just love them! HOL also sends you a lash ruler when you order from them which I though was pretty cool. You can use it to measure the lash according to the shape of your eyes. I never actually used it but it seems to be a pretty handy tool to have, especially since the band of a pair of lashes can be too long sometimes.

I just love House Of Lashes, I truly love their lashes, they are such great quality and they are definitely worth every penny. I promise you will not regret shopping with them!

Thank you all so much for checking out my blog and I will have another post up for you all tomorrow!

Muah!

xoxo


Go To Makeup Look

8 Jan

Hi everyone! So sorry I haven’t been blogging for all of you but I’m back and I’m very excited to be blogging about my usual favorite, which of course is beauty. I was planning on having one or two holiday makeup looks up for you guys, either before Christmas or New Years Eve but unfortunately I never got around to doing that. I may still do a versatile holiday look that you can do for any holiday not just for the holidays I was initially intending on doing that for, but I’m still deciding on that. So lately I have been thinking about posting some more of my makeup looks for you guys on my blog because I feel like I don’t have enough of my looks or re-created looks on my blog. I love sharing my looks with you guys because whenever I do share them I always get great feedback and it seems that everyone really enjoys seeing the different looks I create. Therefore, I have decided that I would share my Go To Makeup Look with all of you since I feel like it is a look that I really enjoy doing on myself. This look is extremely simple and I can guarantee that if you re-create this look on yourself, you will look great and you will love it.

image

image

image

So this what this makeup look, looks like. By the way these pictures WERE NOT EDITED AT ALL. The way I look in these pictures is a true reflection of the products and techniques that I use on myself. I really do like this look and I hope all of you do too!

So let’s get started with the look!

Products Used:

Aveeno Positively Radiant Daily Moisturizer

Benefit Porefessional

L’Oreal True Match Lumi in C3

Rimmel Stay Matte Powder in Soft Beige

Make Up For Ever Pro Finish Multi-Use Powder Foundation in Pink Sand

Stila Stay All Day Concealer in Fair 02

NYX HD Concealer in Fair

Benefit Hoola Bronzer

Anastasia Contour Kit

MAC Mineralized Skinfinish in Perfect Topping

Anastasia Brow Wiz in Soft Brown

Anastasia Dipbrow Pomade in Soft Brown

Anastasia Clear Brow Gel

Urban Decay Naked Basics Palette

L’Oreal’s Miss Manga Voluminous Mascara

Make Up For Ever Smoky Extravagant Mascara

Duo Lash Adhesive

Ardell Demi Wispies in Wine

Lancome Le Crayon Khol in Black Ebony

NYX Lipliner in Nude Truffle

Limecrime lipstick in Coquette

Max Studio lipglosses (no names on them)

Steps:
Moisturizing

So the first thing I always do before I start my makeup is moisturize. It is really important to me to keep my skin moisturized and smooth especially since my skin tends to get dry. I like to use the Aveeno Positively Radiant Daily Moisturizer, I find that it really keeps my skin hydrated and looking fresh. I just apply an even amount all over my face so that every section of my face is moisturized.

Primer

After that I prime my face with Benefit’s Porefessional. This is most likely one of my favorite primers because it really does stay true to its name. It minimizes the size of your pores and helps to create a smooth canvas for the rest of your makeup application. This primer has that usual silicone feel to it like most primers do. This is a good thing because in my opinion, foundation or any other makeup product will stay put and in place on your face. So I usually apply a generous amount of this primer all over my face as well.

Foundation

Next I apply my foundation. For a while now I’ve been using L’Oreal’s True Match Lumi foundation in C3. If you are looking for a good drug store foundation I would definitely recommend L’oreal. Their True Match foundation line is excellent and they offer so many different shades in warm, neutral, and cool tones, so if you are looking for a good low priced foundation you should definitely check out L’Oreal. So once I have my primer applied and blended into my skin I pump some of the foundation on the back of my hand and I dot the foundation onto my face one section at a time. Usually I will do the right side of my face first and then I will work my way to the left side of my face. To blend the foundation into my skin I’ve been using the Tarte Buffer Brush and I honestly cannot say any bad things about this brush. It really pushes the product into the skin and it really does give your face a beautiful, airbrush finish. Once I have the foundation dotted onto my face I blend the foundation into my skin by using the brush in circular motions. I would also recommend when applying foundation you should blend the product out to your ears and down to your neck so that everything looks even and blended.

Set your foundation

Once my foundation is applied I set it with Make Up For Ever’s Pro Finish Multi-Use Powder Foundation in Pink Sand and Rimmels Stay Matte Powder in Soft Beige. I use the Make Up For Ever powder foundation first because not only does it set the foundation that I have already applied to my face but it also gives me a little more extra coverage. After I distribute that to my face I take the Rimmel powder and apply that over it. I notice that the Make Up For Ever powder has pink undertones which causes it to give off a pinkish tinge to my face which causes me to look red. Since the Rimmel powder is light, it will even everything out and make everything look more flattering.

Concealer

Once my powders are applied I begin to conceal. I have been using two concealers at the moment and I have been loving this combination. I have been using the Stila Stay All Day Concealer in Fair 02 and the NYX HD Concealer in Fair. I apply the Stila concealer beneath my eyes first and then I apply the NYX concealer over it. Then I blend them both out with a damp Beauty Blender. When blending out concealer, blend it outwards above your cheekbones, doing this step will help with highlighting. Once I have blended out the concealer I set it with Rimmels Stay Matte Powder to ensure that it will stay in place and that it will not move or crease. To prevent creasing when blending out concealer, look upwards while blending so that the product will not crease, it will only blend outwards and into your skin.

Contouring and Highlighting

Next I contour and highlight my face. I, of course have been using my favorite bronzer probably of all time, which is Benefit’s Hoola Bronzer, and I recently purchased Anastasia’s Contour Kit which is worth every penny, I swear. (I plan on having a post on my blog very soon regarding the contour kit so be on the lookout for that.) I usually mix all three of the contour shades, Java, Fawn, and Havana, that are provided in the contour kit together along with Hoola and I contour my face using the Tarte Slenderizer Brush. I use the angled side of the brush to carve out each section I want to emphasize, I really like this brush because it really helps to create depth and dimension to your face. I always contour my cheek bones, nose, temples, and my jaw line. I also drag some of the bronzer downwards onto my neck as well so that everything is evenly blended. For highlighting I use MAC’s Extra Dimension Skinfinish in Perfect Topping and Vanilla which is one of the highlight shades provided in the contour kit (it happens to be the light shimmery shade on the far right of the palette). I mix both of the shades together and apply them to the tops of my cheekbones, bridge of my nose, cupid’s bow, and chin with a Real Techniques Essential Foundation Brush. I like to use this brush for highlighting because it’s flat so it just glides the product right onto your skin.

Brows

So I am definitely planning on having a brow post up for you guys very soon. I want to share with all of you what I have been doing for my brows and how I have been filling them in lately so definitely be on the lookout for that post. So I use Anastasia’s Brow Wiz in Soft Brown and Anastasia’s Dipbrow Pomade in Soft Brown to fill in my brows. I have been loving the pomade, I recently purchased it and I am obsessed!

Eyes

For this look I like to keep the eyes extremely simple but bold at the same time. I take a flat shader brush and pack on the Rimmel Stay Matte Powder, that I had mentioned earlier, onto my eyes. For this step you can use any kind of light beige or cream shade. I like to use this powder because it helps to create that natural feel to my eyelids. I also like to use a powder for this step because my eyelids do tend to get oily occasionally, so using a powder will prevent any oiliness. I pack the powder on intensely, I go back and forth about five to six times so feel free to put as little or as much, of the powder or shadow on your lids, as you want. Once I complete this step I move onto smoking out my lower lash line. Using a pencil brush, I mix Naked 2 and W.O.S, from the Naked Basics Palette, together and apply this to my lower lash line. This creates a beautiful brown transition to your eye.

Liner

For eyeliner I’ve been using Lancome’s Eye Crayon Kohl in Black Ebony for both my upper lash line and waterline. I just line my upper lash line with the liner, I like to create a thin line because since this look has more of a natural feel to it I prefer it to look as natural as can be. After that I take the same liner and run it through my waterline just to add some more darkness to my eyes.

Lashes

For mascara I’ve been using two of my current faves which are Miss Manga by L’Oreal and Make Up For Ever’s Smoky Extravagant. I just apply both mascaras to my upper and lower lashes. Once the mascara starts to set in I begin to apply lash glue onto the lashes that I will be applying. I have been using Ardell’s Demi Wispies in Wine. The hairs of the lashes are actually a beautiful red color. I have been loving these lashes and I would definitely encourage all of you to check out Ardell’s colored lashes because they are all stunning. The great thing about their colored lashes is that each colored lash brings out a certain eye color. So if you have brown eyes try their purple lashes, if you have blue eyes, like I do, try the wine lashes and same for Green and Hazel eyes. Once the lash glue becomes tacky I pop the lashes right on and and they look gorgeous. Then I run some mascara through them to blend my natural lashes in with the false ones. Always make sure when applying false lashes you apply a generous amount of lash glue to the lash band because lashes do tend to pop off when you wear them so to keep your lashes in place apply a decent amount of glue.

Lips

I line my lips with NYX’s lipliner in Nude Truffle and I place LimeCrime’s Coquette lipstick right in the center of my lips. Once I’ve done that I take two of these beautiful shimmery Max Studio lipglosses and apply them right over that. Unfortunately these lipglosses don’t have names or anything listed on them but they are by Max Studio. I will also create a post on my blog for these lipglosses, it will basically be a review of my opinion on them.

So I hope you guys have enjoyed this post. I definitely encourage all of you to try this look out or even come up with your own Go To Makeup Look! I will have more posts up tomorrow!

If you would like more posts like this, let me know!

Muah!

xoxo

Makeup Look

7 Feb

Hi Beauties! So today I want to share this makeup look that I have recently created, and I thought that I should share it with all of you! Basically the look that I created could be worn whenever, either for a night out, a party or event, etc. This look is really easy to create and I really want all of you to recreate your own version of this look as well. So I will have all of the products that I used in order to create this look, listed below, as well as all of the steps to achieve this look.

ImageSo this is the look that I created. As you can see the eye look is pretty basic. But the lips, really give this look some life. If you would want to recreate this look but if the darkness of the eyes, or the vibrant lip color, is out of your comfort zone, feel free to tone it down for yourself.

Products: 

Benefit Stay Flawless 15 Hour Primer

L’Oreal Magic Nude Liquid Powder in 316 Nude Beige

Benefit Hoola Bronzer

MAC Pink Swoon Blush

MAC Soft & Gentle Mineralized Skinfinish

Anastasia Brow Wiz Pencil in Soft Brown

Urban Decay Naked Basics Palette

MAC Soft Brown eye shadow

Maybelline Eye Studio Shadow Quad in Coral Oasis

L’Oreal Voluminous Smoldering eye liner in Black

NYC Liquid Eyeliner in black

Benefit’s They’re Real! Mascara

Covergirl’s Clump Crusher Mascara

Revlon’s Lash Potion Mascara

Maybelline’s Mega Plush Mascara

Ardell 120 Demi lashes

Duo lash adhesive

L’Oreal La Laque Balm in Laquer-ized

Step 1: So first, your going to want to make sure your face is primed. For this step, I used Benefit’s Stay Flawless 15 Hour Primer. Even though I never wear my makeup for more than 8 hours, this is a great primer to have, for traveling or just in general. I applied this primer evenly, to my face. This primer is in a stick form, and the formula of this primer is amazing. The purpose of face primers or eye primers, basically the purpose of any primer is to keep the wear of your makeup last longer.

Step 2: Apply a foundation. For this step I used L’Oreal’s Magic Nude Liquid Powder in the color 316 Nude Beige. I usually don’t use foundation often, but I really like this formula because you could either create a light coverage or a more fuller, intense coverage with this foundation. I do have a post on my blog about this foundation, so check that out for more information, regarding this foundation.

Step 3: Fill in your brows! So I have been absolutely obsessed with filling in my eyebrows. I try not to fill them in to much, but I really enjoy doing this step, because I feel like it just brings the makeup look together. Having tamed eyebrows is definitely a must have, when doing your makeup, since the eyebrows tend to shape the face. So I have been using Anastasia’s Brow Wiz in the color Soft Brown, and I can’t seem to say enough good things about this product. Definitely check it out and buy it for yourself!

 Step 4: Contour, Blush, and Highlight. For contouring I used Benefit’s Hoola bronzer to contour my face. By contouring your face, you will give you face a slim look, by adding dimension and definition to your face. After I contoured, I used MAC’s Pink Swoon blush above my contour lines. Since this blush is a very pretty pink sheertone blush, I was able to give a nice pinky glow to the apple’s of my cheeks. Next I used MAC’s mineralized skinfinsh in Soft & Gentle to highlight my face. I used this highlight to keep my skin looking bright and to also add a little pop of shimmer to this look as well. When you are using a highlighter or any type of highlight color, make sure you keep that color within the central panel of your face. Meaning that you should apply this color above the area in which you applied your blush, nose, chin, cupid’s bow (little “bow” over the lips), and lower forehead.

Step 5: Apply a brow bone and inner tear duct highlight. So for this step I used Urban Decay’s Naked Basics palette. I used the color Foxy, which you can also find in the Naked 2 palette, to highlight my brow bones as well as the inner tear ducts of my eyes. This color has a matte finish so it will give your makeup some lightness without it being to vibrant or shimmery.

 Step 6: Start to define your crease. Using MAC’s eye shadow in the color Soft Brown I took a fluffy brush from BH Cosmetics and blended this color into my crease. By defining your crease, you will add some definition to your eyes. This step also helps when doing your makeup because it sort of acts like a marker so that you know not to take your shadow up to high. This color is a light reddish matte brown shade, and since the main color that we will be using on our eyes is shimmery, this color will definitely show some contrast within the colors that are going to be used for this look.

Step 7: Add main shadow to your eyelid. Using Maybelline’s eye studio shadow quad in Coral Oasis, I took the last shadow in the quad, which is a dark shimmery brown, and I applied onto my eyelid, without taking this color up into the crease. Since this color is dark, you really want to make sure that it is blended well, you don’t want this color to look harsh.

Step 8: Apply liquid eyeliner and eyeliner to your waterline. Once you have your eye shadow the way you want it to look, apply a liquid liner to your top lash line. For this step, I used NYC’s liquid liner in black and lined my top lash line. I kept the line thin and I did not wing it out, but feel free to wing out your liquid liner if you would like. After that, I applied L’Oreal’s smoldering eye pencil in black to my waterline.

Step 9: Apply mascara. So when I usually apply mascara, I usually apply a bunch of different mascaras at the same time to add more volume and length to my natural lashes. All of the mascaras that I used for both my bottom and top lashes, are listed above.

 Step 10: Apply false lashes. This step is optional, but I like to wear false lashes to create more of a dramatic, intense look. I used Ardell’s 120 demi lashes with Duo lash adhesive, in clear tone. After you apply false lashes go back over the band of the lashes with the same liquid liner that you used earlier to line your top lash line, to make your lashes look less noticeable and to also make them look more natural and real.

Step 11: Apply a lip color. For this step, I used L’Oreal’s La Laque balm in the color Laquer-Ized. These balms are no longer sold by L’Oreal in drugstores anymore, so feel free to apply any lip color of your choice, you could do a pink lip, a nude lip, or even a light purple lip. I used this color to add some color and vibrance to this look.

By the way some of the brushes that I used for this look are from Real Techniques. You can purchase these brushes at Bed Bath & Beyond or their website, http://www.realtechniques.com. But I will have a post up soon regarding the brushes that I use when I do my makeup and also how I clean them as well.

So I hope that you have all enjoyed this look! And I really do encourage all of you to recreate this look for yourselves!

xoxo